|
1. |
Shading is blended on round objects. Shading is solid on square objects. |
|
2. |
Shade either side, but be consistent throughout your drawing. |
|
3. |
Do 5 jumping jacks, roll around the floor for 12 seconds and shake out your hands. |
|
4. |
Now, draw shading on these objects: |
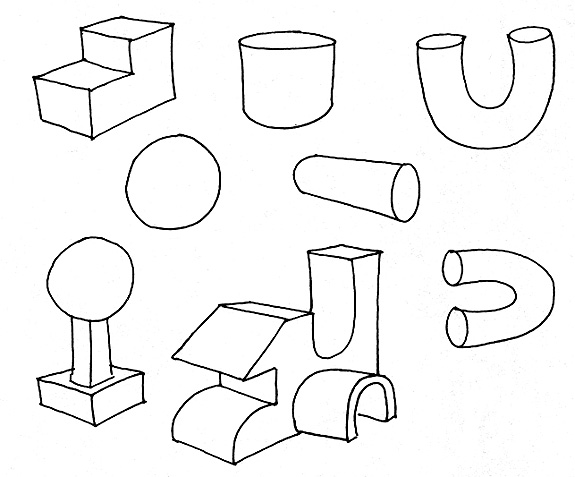
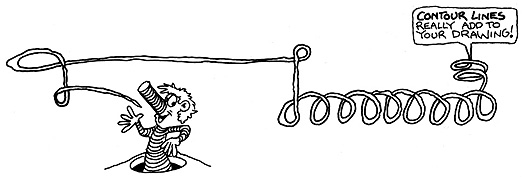
Now let's go on to our next keyword of drawing. Contour lines give objects shape and volume. These lines also add character to your sketches . . . such as wrinkles to a shirt sleeve or fluffiness to a cloud. These lines are very cool to work with. You'll find that once you start applying contour lines , you won't want to stop. Take a look at the effect it has on these objects:

![]()
Now let's draw this really cool bear called "Uni-Ted." Before you start, please note that in the first 4 steps you are drawing very light "guidelines" to help with your drawing. You may have to go back and erase some of the guidelines later.
|
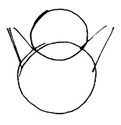
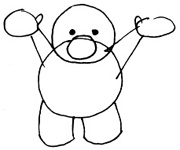
Step 1 Draw two overlapping circles. The top circle should be smaller than the bottom circle. |

|
|
Step 2 Draw four angled lines as shown. These lines will form Uni-Ted's arms. The distance between these lines should be greater at the bottom (closer to the body) and closer together near the ends. Note that the upper set of lines start right at the intersection of the two circles. |
|
|
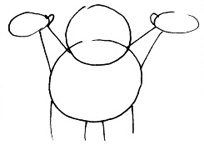
Step 3 Now, draw the outlines of the paws (ovals) and the legs. You can put little nubs on the hands for Uni-Ted's thumbs as shown. |
|
|
Step 4 Complete the bottoms of the legs using your foreshortening technique. Add dots for the eyes and the outline of Uni-Ted's snout. |
|
|
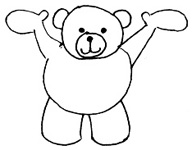
Step 5 Now add the ears and the lines for Uni-Ted's nose and mouth. See how some of the guidelines that don't belong have been erased? |
|
|
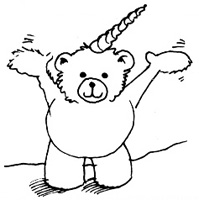
Step 6 Now we're at the all important step of adding Uni-Ted's horn. Remember to add contour lines to the horn and shading below his feet. Remember that the light source is from the right of the drawing, so the shadow will be on the left side. Also, adding a surface in the background helps us to tell that your bear has something to stand on. |
|
|
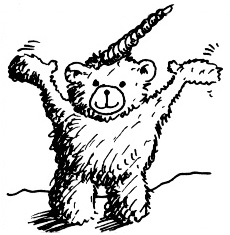
Step 7 Now for the final touch - adding shading , contour lines (hair) on your bear's body, and extras. The lines you see around Uni-Ted's paws give the observer the effect of movement. |
|
|
|
Copyright © DrawSquad.com |